


Maybe the words “deep clean” feel a little daunting, especially when you think about your refrigerator. When was the last time you even looked in the vegetable drawer? And don’t even get started on those old leftover containers from who-knows-when. If you’re tired of opening the fridge and analyzing the science experiments collecting inside, Maid Perfect can help. Owner Drew Freemantle has the perfect guide to getting your fridge back to the spic and span state it used to live in all those years ago. With these steps, you can roll up your sleeves and say good-bye to gunk!
But wait! Before you start pouring soap on everything, let’s get the fridge emptied out. You’ll need to clear some counter space to make room for the drawers and shelving. A deep clean like this can take about 1-2 hours, so be sure to get an ice chest to keep your food cold while you clean.
In order to clean like a pro, you’re going to need the right supplies. Every super-scrubber arms themselves with the following when they are facing their dirty fridge:
- Dish soap
- Blue scrub pad
- A couple of wash cloths
- A toothbrush and pipe cleaners if you have tight spots to clean
- Rubber gloves (if you like to keep your hands dry and clean)
Got your gear? Let’s start cleaning!
Step 1: Fill the sink with warm water and a couple squirts of dish soap.
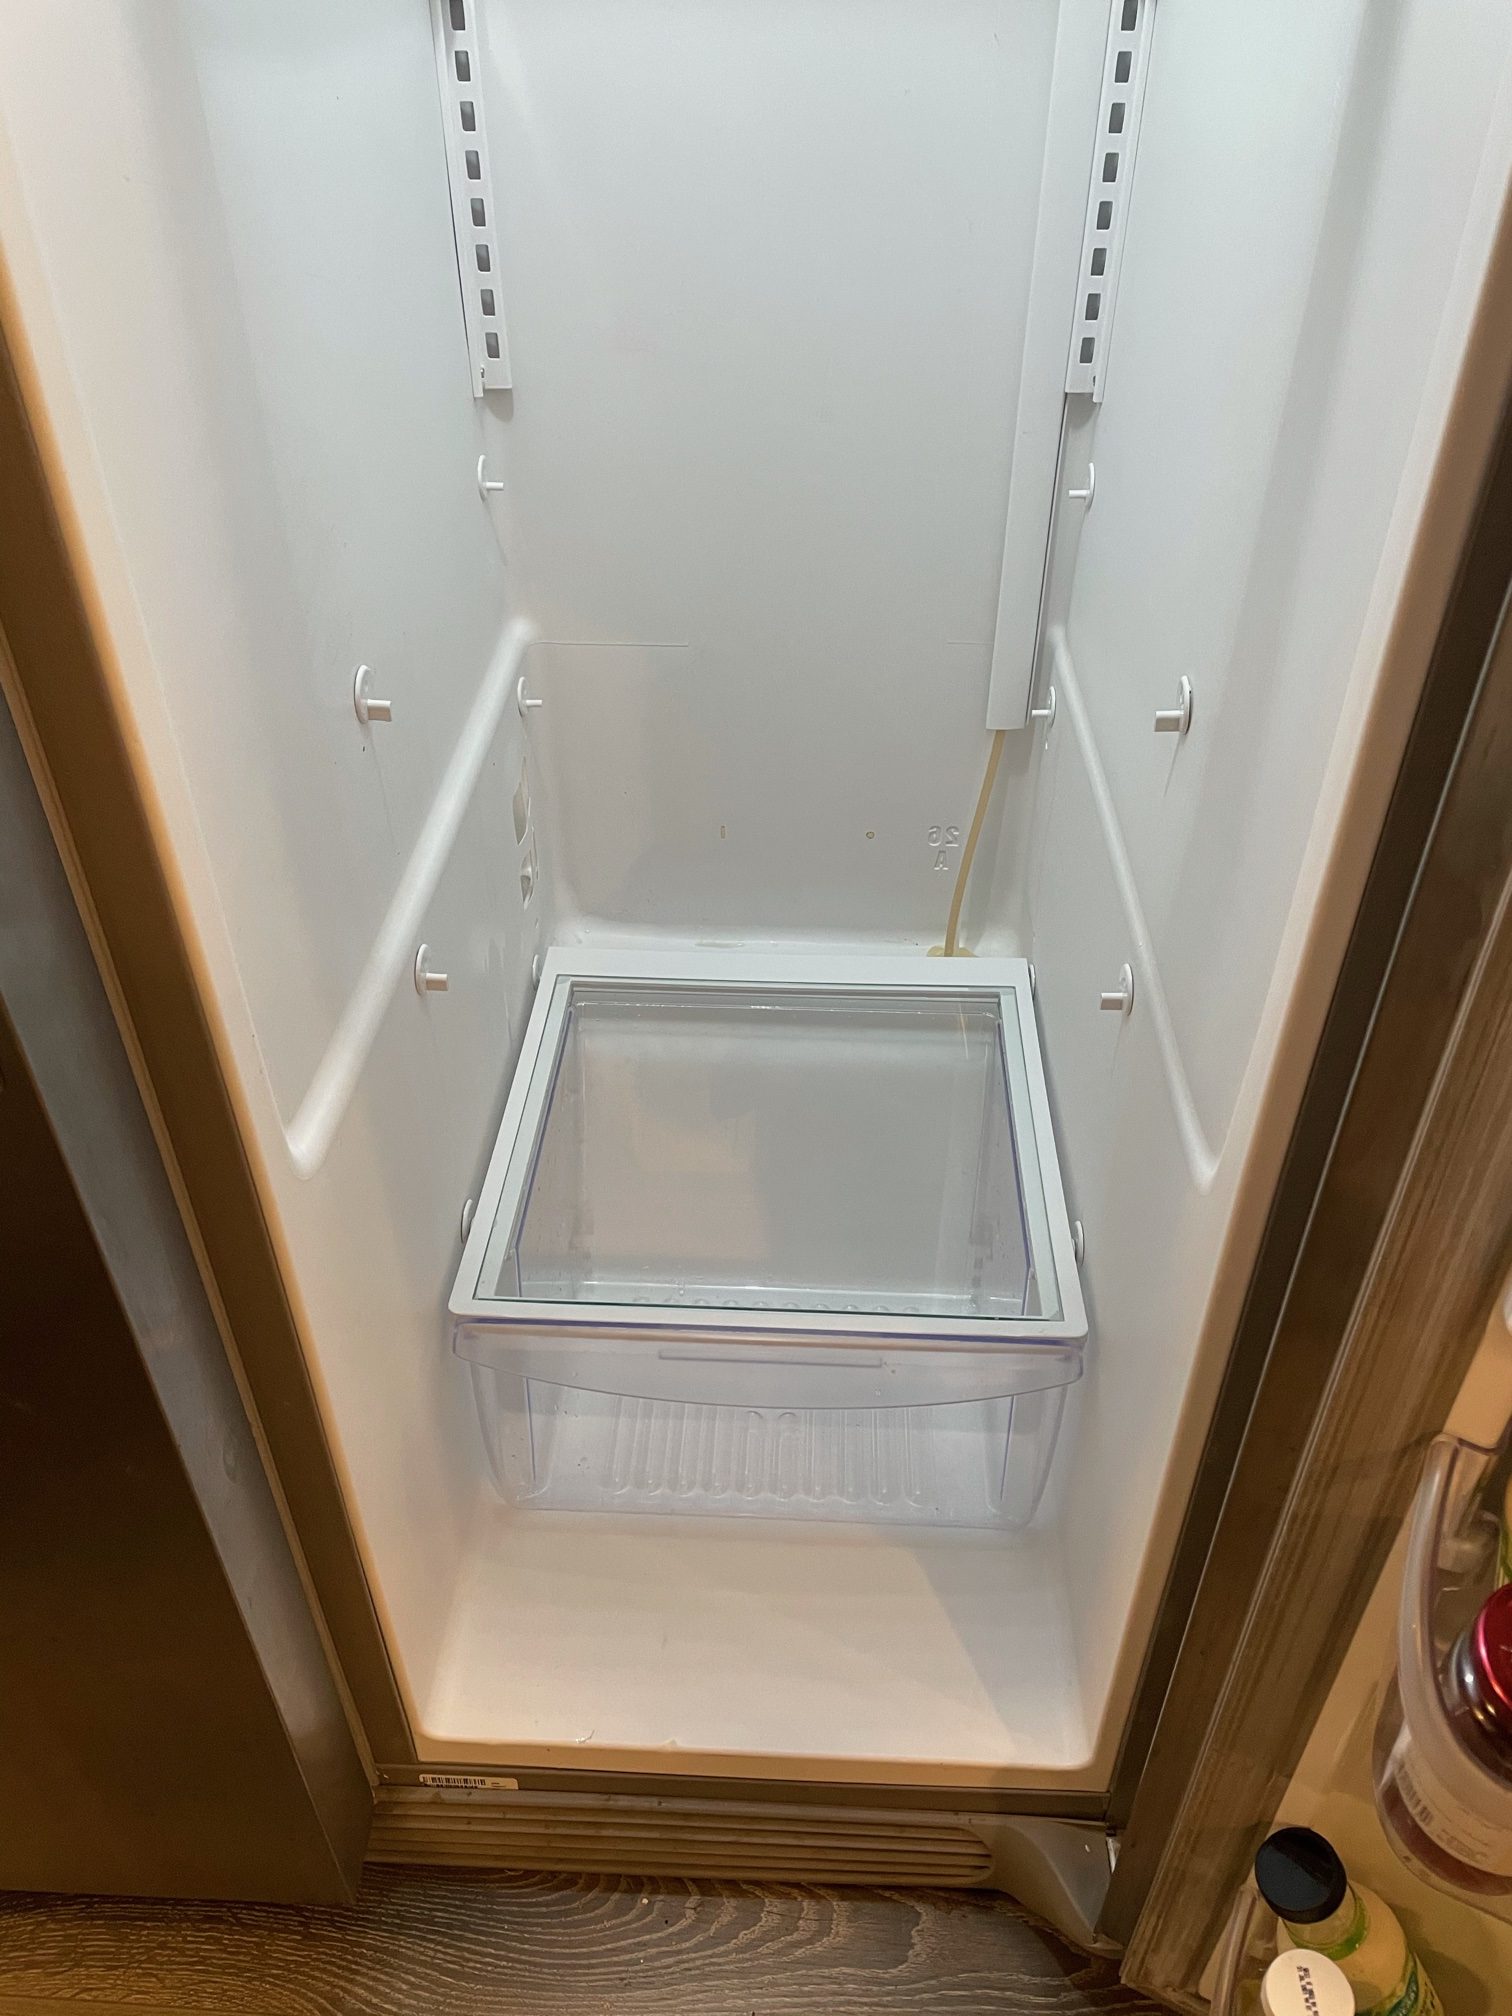
Step 2: Carefully remove all the drawers and shelves from the freezer and fridge.
- Before you start, look at how the shelves are attached so you don’t have to force them out. The cold makes some drawers fragile, so too much force could cause them to crack.
- When removing the shelves, always secure the glass by placing a thumb over the top of it. Most shelves with pullout drawers have removable glass, so holding it in place will keep the glass from popping out.
- Make sure that all shelves and drawers are put securely on the counter.
Step 3: Clean the inside of the fridge with the blue sponge and dish soap. You will find most of the mess around the shelf supports and the back of the fridge.
- Be careful not to get any liquid on the fridge light as this could cause it to burst. Some lights have covers which can be removed and cleaned if needed.
- Have lots of loose crumbs? A mini shop vac works great to clean up those pesky left-behinds!
- For stubborn stuck-on food, just use a little more soap and let it sit while you work on another part of the fridge.
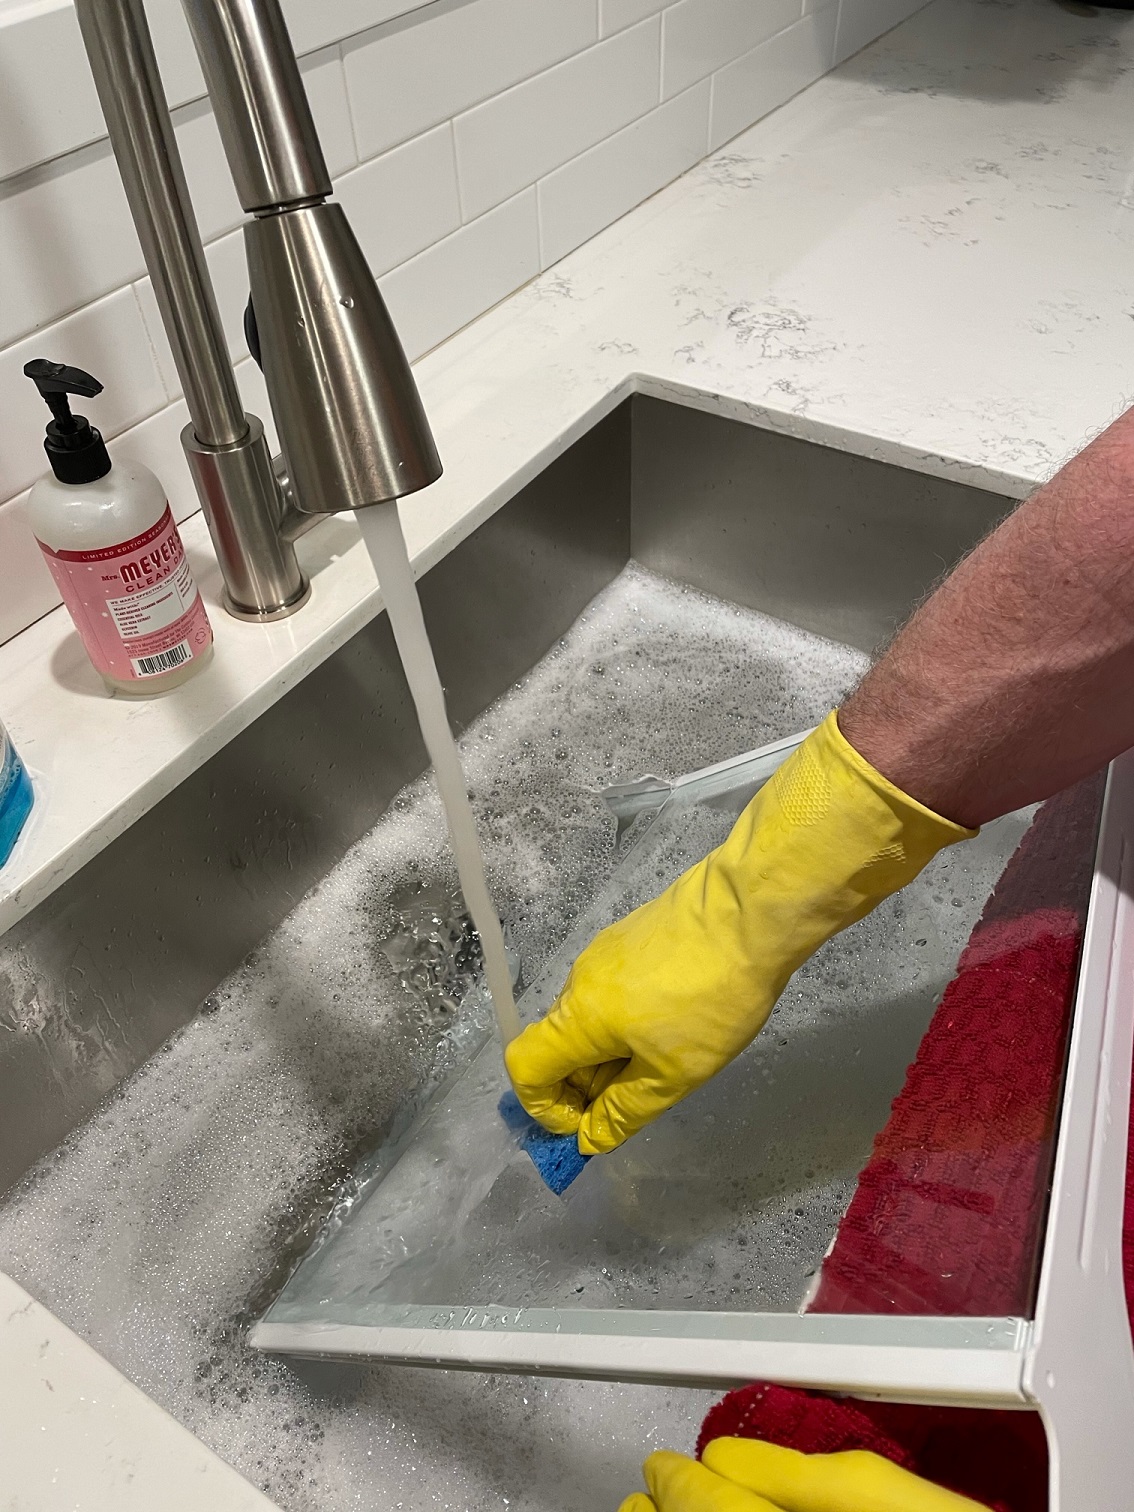
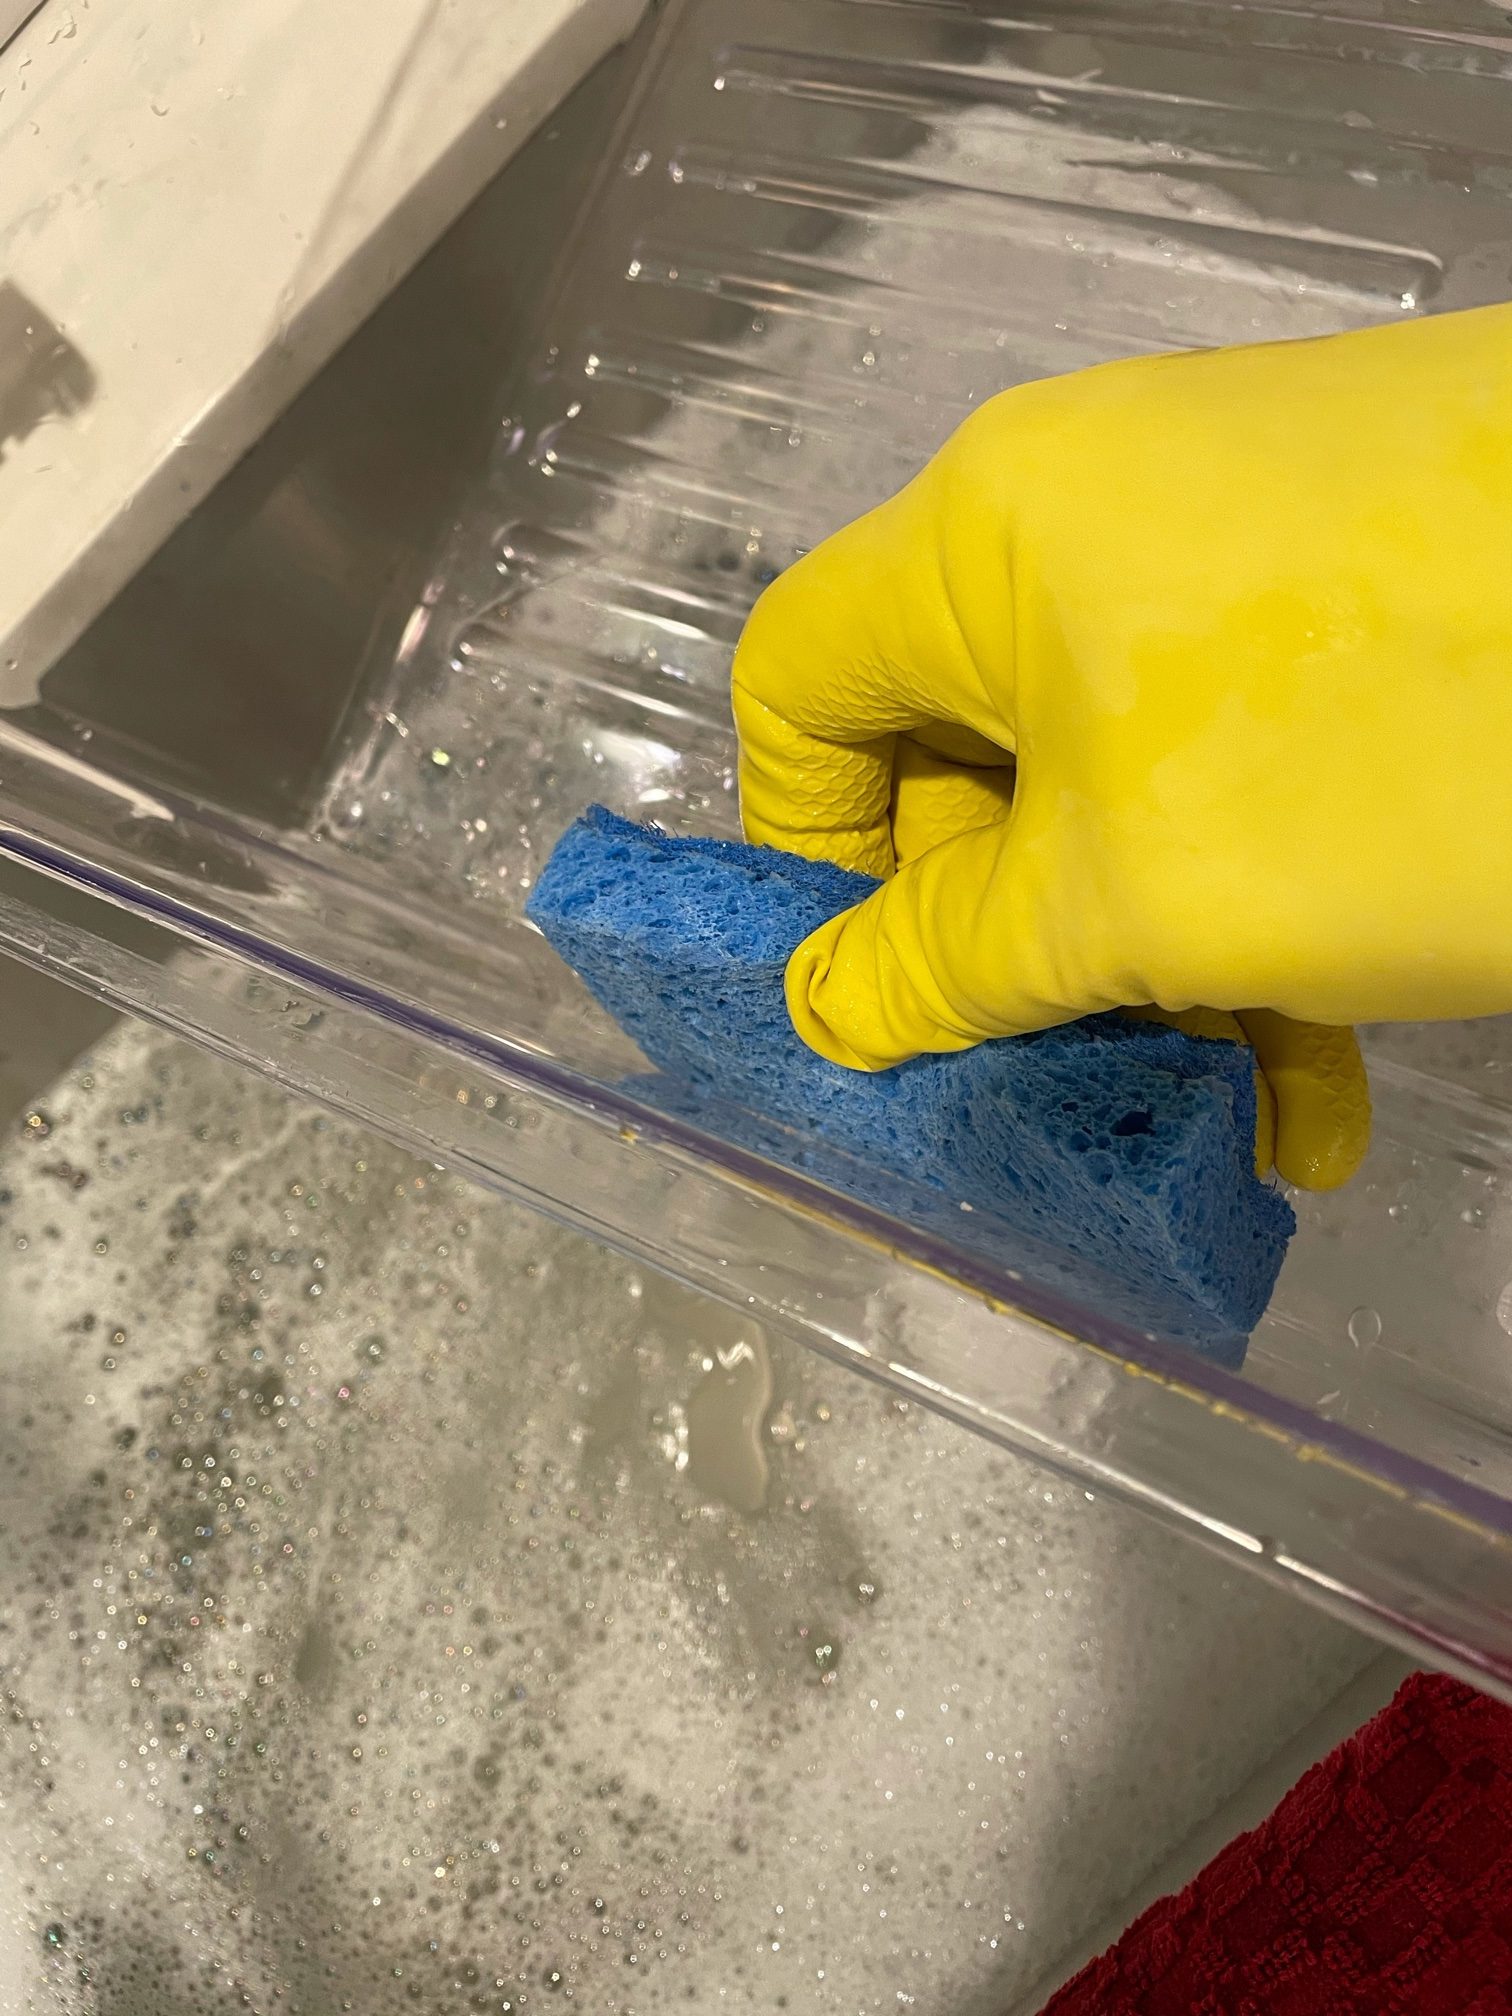
Step 4: Wash the drawers and shelves in the warm soapy water.
- For really stuck-on food, let the drawer or shelf soak in the warm water for a while. This will make it easier to clean.
- When washing shelves, you want to look at the outside frame. A lot of food and crumbs get stuck in this spot and can be easily removed with a toothbrush while running water over it.
- If the glass is removable, it can be removed by lifting gently on the glass facing the back. If you are finding it hard to remove, it could be stuck by the infamous food glue! This can be resolved by soaking the stuck section in warm water for about 5 minutes.
- There is nothing more annoying than washing things in the sink and walking away with a soaked shirt. A long towel placed in front of the sink can prevent your shirt from getting wet while you clean.
Step 5: Once the shelves and drawers are washed, dry them with a clean towel and place them back in the fridge.
Step 6: Clean the seal of the fridge by running a sponge through the creases. Most seals collect crumbs and gunk, so this will make sure your fridge is sealing well.
Step 7: Clean the freezer. The easiest way to do this is to continually keep your sponge wet with warm water. If you don’t, the sponge will begin to freeze due to the cold temperature.
Step 8: Clean the top, sides, and back of the fridge. You will likely need to pull it out away from the wall to do this.
- Careful! Moving the fridge can sometimes leave pressure marks on the floor. Most times this can be prevented with a large piece of cardboard to run the fridge’s wheels on.
- For non-stainless steel, the front can be cleaned with an antibacterial cleaner or just plain soap and water.
- If it’s a stainless-steel fridge, try using Zep Stainless steel cleaner with a microfiber cloth. Never use anything abrasive on stainless steel!
Step 9: Stand back and admire your hard work! You may need to put on some sunglasses to keep yourself from being blinded by all the shine and sparkle coming off your fridge now.
For more awesome cleaning tips or help with larger cleaning jobs, contact Maid Perfect. They are proudly serving Thurston county and are happy to help get the rest of your home back to looking shiny and new!
Sponsored


